,

Logo Requirements For Custom Print

Logo requirements and setup process

You can help us achieve a professional looking print on your wallplate. Here’s how:

  1. Supply quality logo material
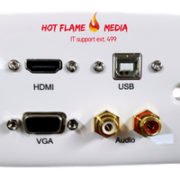
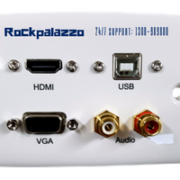
    A logo in high definition, minimum 300 dpi is preferable. A version of your company logo that is used on your website is not sufficient. Submit logo in any format (vector based format is best) and specify any design info and/or hex colour codes.
  2. Choose logo position
    Top or bottom of wallplate: confirm where your logo goes or contact us for a recommendation.
  3. Print more information?
    Apart from the logo, consider other information to include on the wallplate. This may be an (IT helpline) phone number, website, email address, an additional text (site location, department) or even a slogan.
  4. Print a few or print all
    Some customers choose to have their logo printed on every wallplate, while others only require a print on some wallplates. When placing your order, we need to know what your default preference is
  1. Email high resolution logo and all info as outlined above to sales@kidigital.com.au

Smart Connect Your Home Entertainment System

Time to smart-connect your home entertainment system.

You have the best entertainment system set up at home. If you’re lucky, it may include the latest ultra high-definition, high dynamic range smart OLED TV. While the front is a pleasure to look at, the back is probably a different story.

Why not organise your fab equipment without the cables in the back looking like a western spaghetti junction? Round up the power cables, extension cables, adapter cables, HDMI, VGA and RGB cables. Get the ease of use that your home entertainment system offers you both front and in the rear. Here are a few tips.

Tip 1: Start a list of the connections you use for your current AV equipment.

Before you wallmount a TV, it’s worth considering the wallplate that goes behind the screen. It’s important to match the connections of the back of the TV but for many home installations, matching ALL of the AV connections on the back of the TV is an overkill as many of them will never be used. This is also a good time to future-proof your connections infrastructure.

If you are building a home and the plasterboard hasn’t been installed yet… Great! You have the option to go crazy and if cost permits, install all of the AV cables you will need in the wall cavity – out of sight and ready to use.

Tip 2: Plan ahead: which AV connections do you need in future?

Formats like HDMI are always evolving, getting faster to support the bandwidth of new TVs. Buying a HDMI cable today will unfortunately not be suitable to use with your TV in a few years’ time. You want to get the best quality AV connection out of your TV today, so it still makes sense to install HDMI cables in your wall cavity.

Tip 3: Use Cat 6A cables to future-proof AV setups

Cat 6A network cables are your friend! Install multiple Cat 6A RJ45 cables as a way of future-proofing your AV setup. Most AV signals can be converted to run over Cat 6/Cat 6A cables. Baluns are often run over long distances in a commercial environment, but for domestic uses they can be installed to utilise existing cable in a wall cavity.

Tip 4: Think of backup AV connections

Even though HDMI is the preferred choice for AV connection, it is a good idea to have some backup AV connections for devices that do not use HDMI. It saves you hunting down a cable connection that may or may not be available any longer.

Tip 5: Customised wallplates, the organised home entertainment hub

A wallplate that houses all of the connections found on the back of your smart TV. Any brand, any type. Straight from the device into the wall, without the need for adapters. Sound good? Kidigital can manufacture a custom AV wallplate with all the connections you need, where you need them. HDMI, Component (also used as Composite Video), USB, Data and Composite AV.

,

Interactive Whiteboard Wallplates

In order to operate an Interactive Whiteboard in a school or office, it is important to properly connect a laptop or desktop computer. At Kidigital, we design, manufacture and assemble AV wallplates to be used for just this purpose.

In their simplest form, many Interactive Whiteboards require at least one video connection (usually VGA or HDMI) and also a USB connection. Audio Visual wallplates such as WP506 (1x VGA female to female connection and 1x USB 2.0 Type-B female to female connection) allow a laptop or desktop computer to be quickly and easily connected to the Interactive Whiteboard.

Newer Interactive Whiteboards incorporate a HDMI connection as well as a VGA (HD15) connection. Many AV Installers will run both of these cables in the wall in order to give the teacher or operator a choice of connection. Together with an optional 3.5mm Stereo Audio Connection, the AV wallplate may look like this.


Connecting a wallplate to an Interactive Whiteboard

Once AV connections have been decided, the next step is to work out how these cables will be terminated. This is often dictated by the length of cables that are required.

HDMI for HDMI is simply a matter of running a good quality HDMI male to male cable and plugging this in to the female HDMI connection on the rear of the wallplate.

For VGA, pre-made male VGA leads can be plugged in to the female VGA connection on the rear of the wallplate. If raw HD15 cable is installed in the wall, then the VGA connection on the rear of the wallplate needs to be terminated with a screw terminal VGA connection.

USB cabling requirements will change depending on the length of cable required. For cable lengths less than 5m, no USB extenders are required. For lengths over 5m then at least one USB Active Extender is required. It is important to consider the length of USB cable that will possibly be used by the operator of the Whiteboard.

Change the labels on the wallplate

It is also possible to change the default labels that ship with our wallplates to give the connections better meaning and make it easier for the teacher or operator to connect their computer to the Interactive Whiteboard.

We can print the text ‘Whiteboard’ instead of ‘USB’ and add a logo onto the wallplate for repeat business, service or support.

5 Great Reasons To Put Your Logo On A Wallplate

Printing your logo or website onto a wallplate has many benefits. Here are the top 5 reasons why you should have your logo printed onto a customised wallplate.

  1. Professional promotion for your company

Wallplate logos are a professional way to get brand name recognition. You decide how discrete you would like your logo to be. In addition to your company logo, you can also add information like a website url, helpline phone number, slogan or department or location.

  1. Make your client happy with customised wallplates

A client-specific selection of switches and connections and the client’s company logo on their wallplates: your client will appreciate you providing them with these custom services to support the client’s business.

  1. Service or support

What better way to help someone when plugging in their AV equipment than having the contact details printed directly onto the AV wallplate?

  1. Repeat business

Every company looks for ways to grow their business. One of the easiest ways to do this as an installer is by getting your details in places so your customers have an easy option to contact you when they require more AV work done.

  1. Ease of re-ordering

Why not incorporate a part number onto the wallplate for ease of re-ordering by your customers? Your logo together with a discretely printed part number makes it easy for your customers to re-order the same AV wallplate from you.

For more information, see FAQ logo printing.